What this section is for #
The White Label section allows the Provider to configure the main brand shown to users in their area and to define whether Tenant Admins can, in turn, customize their own tenant’s name and logo.
From this page, the Provider can manage two levels of branding:
- Provider Brand
The Provider’s main brand, shown as the general visual identity. - Tenant customization policy
The rule that determines whether Tenant Admins can use their own logo and name.
Provider Brand #
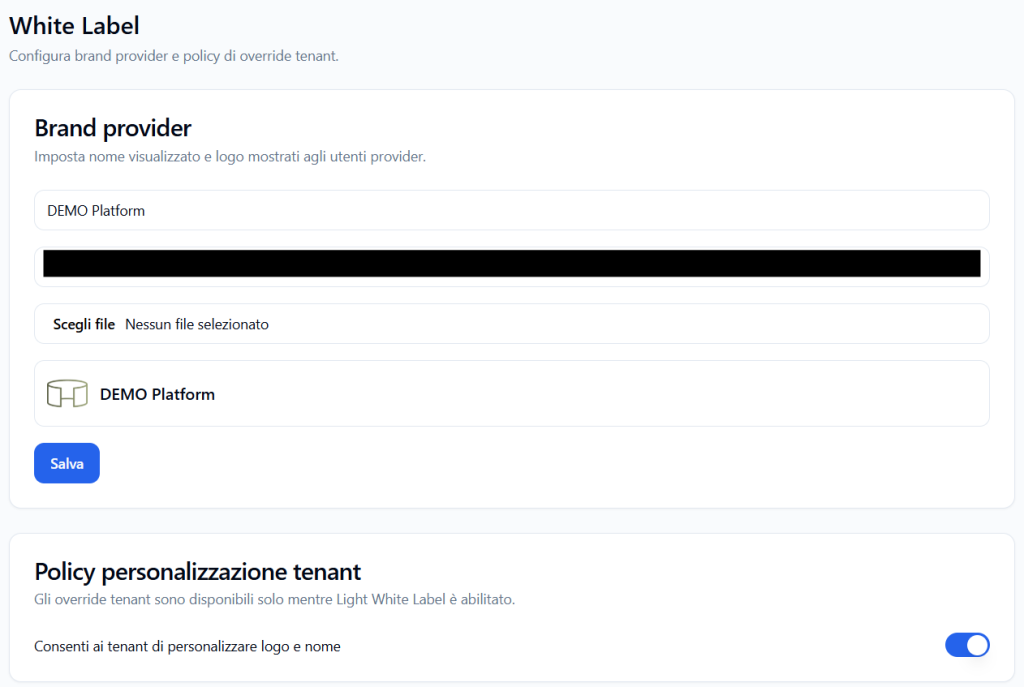
The Provider Brand section allows you to set the display name and logo associated with the Provider.
This information is used to personalize the experience of users connected to the Provider environment.
Brand name #
In the main field, you can enter the Provider brand name.
Example:
DEMO Platform
This name represents the identity displayed on the platform for the Provider.
It can correspond to:
- the Provider company name;
- the name of the training platform;
- the commercial name of the service;
- the name of the program or academy.
Upload a logo #
The Choose file button allows you to select an image from your computer.
The uploaded logo is associated with the Provider brand.
Before uploading the logo, it is advisable to use an image that is:
- legible even at small sizes;
- consistent with the Provider’s visual identity;
- not too large in file size;
- suitable for display in the platform header;
- preferably with a transparent or clean background, if required by the design.
Brand preview #
The preview section shows how the Provider logo and name will appear.
Example:
DEMO Platform
This preview allows you to quickly verify if the brand is displayed correctly before or after saving.
Saving changes #
After changing the name or uploading a new logo, click Save.
The system updates the Provider’s White Label configuration.
The saved changes become the primary visual reference for the Provider environment.
Tenant customization policy #
The Tenant customization policy section allows the Provider to decide whether Tenant Admins can customize their own brand.
This setting controls the ability for each tenant to enter their own name and logo.
Allow tenants to customize logo and name #
The Allow tenants to customize logo and name option enables or disables White Label customization at the tenant level.
When the option is active, Tenant Admins can access their own White Label section and configure:
- tenant brand name;
- tenant logo;
- the image visible to tenant users after login.
When the option is disabled, Tenant Admins cannot independently customize the name and logo. In this case, the tenant inherits the brand defined by the Provider or the general configuration provided.
When to enable tenant customization #
The Provider can enable tenant customization when they want to allow each tenant to have its own visual identity.
This option is useful, for example, when tenants represent:
- different clients;
- different companies;
- internal departments with separate identities;
- university departments;
- operational sites;
- business units;
- distinct training programs.
Example:
A Provider manages multiple tenants:
- Tenant A: San Marco Hospital;
- Tenant B: North Clinic;
- Tenant C: Medical Training Center.
By enabling tenant customization, each Tenant Admin can display the specific name and logo of their environment.
When to leave tenant customization disabled #
The Provider can leave tenant customization disabled when they want to maintain a single, centralized brand.
This choice is useful when:
- all tenants must use the same Provider brand;
- the Provider wants to maintain visual consistency;
- tenants represent internal departments without a separate identity;
- the commercial plan does not include Tenant White Label;
- brand management must remain centralized.
In this case, the Tenant Admin cannot modify the name and logo independently.
Relationship between Provider White Label and Tenant White Label #
The Provider White Label is the primary level.
The Tenant White Label is a secondary level, available only if the Provider allows it.
In summary:
- the Provider configures their main brand;
- the Provider decides if Tenant Admins can customize the tenant brand;
- the Tenant Admin can enter the tenant’s name and logo only if the policy is enabled;
- the end users see the actual brand intended for their environment after login.
Practical example #
Case 1 – Tenant customization disabled #
The Provider sets:
Provider Brand: DEMO Platform
Tenant customization is disabled.
Result:
- tenants cannot enter their own logo;
- users see the Provider brand;
- the visual experience remains centralized.
Case 2 – Tenant customization enabled #
The Provider sets:
Provider Brand: DEMO Platform
Tenant customization is enabled.
The Tenant Admin can set:
Tenant Brand: Company Demo
Tenant Logo: customized company logo
Result:
- the Provider maintains their main brand;
- the tenant can show a specific identity to its users;
- Players and tenant users see the brand configured by the Tenant Admin.
Best practices #
To correctly configure the Provider White Label, it is advisable to:
- use a clear and recognizable brand name;
- upload a legible logo consistent with the Provider’s identity;
- check the preview before considering the configuration complete;
- enable tenant customization only when it makes sense to allow separate brands;
- keep tenant customization disabled if a centralized visual identity is desired;
- communicate to Tenant Admins whether they can or cannot customize their brand;
- verify that the feature is included in the Provider’s plan or membership configuration.
Final result #
The Provider White Label section allows the Provider to control the platform’s main visual identity and decide if tenants can customize their name and logo.
This configuration allows for managing both centralized brand scenarios and multi-tenant scenarios where each tenant has its own visual identity.
The Provider defines the policy.
The Tenant Admin customizes their brand only if authorized.
Users see the actual brand intended for their environment.


